Adding Portainer to Existing Canine Account
If you already have Canine installed and want to add Portainer integration, follow these steps to connect Portainer to your existing Canine instance.
Prerequisites
- An existing Canine installation
- Portainer installed and running
- Admin access to both Canine and Portainer
1. Create a Portainer access token
Go to your Portainer dashboard, and navigate to My Account → Access tokens → + Add access token, and create a new access token.
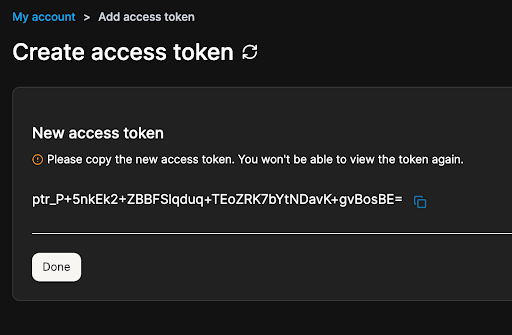
Save this token securely - you'll need it in the next step.
2. Configure Portainer in Canine
Navigate to your Canine dashboard and go to Account → Stack Manager.
Enter the following details:
- Stack Manager Type: Select Portainer from the dropdown
- Portainer URL: The URL where Portainer is accessible from the Canine container. If using the shared Docker network, this is typically
https://portainer:9443 - Account Access Token: Paste the access token you created in step 2. This token is used for all members of the account to perform asynchronous Git deployments.
- Enable role based access control: When enabled, cluster access is done through the user's Portainer session, and the access token is only used for async Git deployments.
Click Save Configuration to connect Canine to Portainer.
3. Verify the connection
Once configured, Canine will verify the connection to Portainer. You should see a success message indicating the integration is active.
You can now use Portainer features directly from within Canine to manage your underlying cluster.
Troubleshooting
Connection refused errors
Ensure both containers are on the same Docker network:
docker network inspect portainer_network
Both canine and portainer containers should appear in the list.
Invalid access token
Verify that the access token is still valid in Portainer. Tokens can be revoked or expired. Create a new token if needed.